Saturday, August 21, 2010
2010 where did you go
Well it looks like I fell off the face of the earth for 2010, but I'm still here (with an unfinished Ardubot blog). Anyway long story short, moved out of my apartment without a new place to live so while I'm staying at friends houses all my stuff is in storage including all my robot stuff :( I have my Ardubot and a spare Arduino so I might start a bit of tinkering again soon.
Thursday, December 31, 2009
Ardubot Arduino
Yeah, programming time!
First step is to download and get the software up and running for the Arduino. I didn't have any problems, but that might be because I had some other serial and avr stuff already installed. Some people I believe had do download java or some such other things.
Step two is to hook up the Arduino so that the computer can see it. Under the tools drop down menu you will need to select 'board' and select which board you are using. Then you will select 'serial' (also under the tools menu) and select where your board is attached. There are ways to find out which port your board is attached to but trial and error works too.
Next we are going to start typing, I know I could give you a file to download, but I think you learn more if you type it (although you will probably just copy and paste anyway). So here is the code
When its all typed you are going to select the left most icon on top, the one that looks like a play button. This will compile or verify your program . At this point make sure your Arduino board it attached to your pcb board. Then select the second to last button (a right arrow) this should upload the program to your Arduino. After a second or two the Arduino will restart and you should see/hear your motors going. Now is a good time to unplug the Arduino, once the Arduino is off you can add the wheels. Don't put the wheel by the USB port all the way on, you still need the USB cable at this point for power. So try it, see what you've got, and have fun playing with the code
First step is to download and get the software up and running for the Arduino. I didn't have any problems, but that might be because I had some other serial and avr stuff already installed. Some people I believe had do download java or some such other things.
Step two is to hook up the Arduino so that the computer can see it. Under the tools drop down menu you will need to select 'board' and select which board you are using. Then you will select 'serial' (also under the tools menu) and select where your board is attached. There are ways to find out which port your board is attached to but trial and error works too.
Next we are going to start typing, I know I could give you a file to download, but I think you learn more if you type it (although you will probably just copy and paste anyway). So here is the code
char MLR = 9;  //Left Motor Reverse

char MLF = 6;  //Left Motor Forward

char MRR = 5;  //Right Motor Reverse

char MRF = 3;  //Right Motor Forward


void setup(){

pinMode(MLF, OUTPUT);

pinMode(MLR, OUTPUT);

pinMode(MRF, OUTPUT);

pinMode(MRR, OUTPUT);

}


void loop(){

digitalWrite(MLF, HIGH);

digitalWrite(MRF, HIGH);

delay(1000);

digitalWrite(MLR, HIGH);

digitalWrite(MRR, HIGH);
delay(1000);
}
When its all typed you are going to select the left most icon on top, the one that looks like a play button. This will compile or verify your program . At this point make sure your Arduino board it attached to your pcb board. Then select the second to last button (a right arrow) this should upload the program to your Arduino. After a second or two the Arduino will restart and you should see/hear your motors going. Now is a good time to unplug the Arduino, once the Arduino is off you can add the wheels. Don't put the wheel by the USB port all the way on, you still need the USB cable at this point for power. So try it, see what you've got, and have fun playing with the code
Monday, December 7, 2009
Ardubot Solder
In this step you will need the PCP board, the headers, the power switch, the H-bridge (the IC chip) and your soldering stuff
1. Break the headers so you have 2 pieces of 6, 2 pieces of 8 and 3 pieces of 2
2. Solder the pieces of 6 and 8 onto the board in the holes that are labeld
3. Solder 1 of the 2 pin pieces in the unlabeled holes next to where the power switch goes
4. Solder the powerswitch in
5. Solder the H-bridge in
The silk screening will be on the bottom of your robot.
All pins should be placed so that the smaller end goes through the board, and the longer end is sticking up
The H-bridge goes on the bottom of the board (match up the notch on the board and the chip)
6. Solder the other 2 pin pieces next to the H-bridge facing down
7. Screw the motors onto the bottom of the board with the brakets (brakets are keyed). Don't attach wheels yet
8. Bend the 2 pin pieces next to the motors so they are near the contacts on the motors
9. Solder the 2 pin pieces to the motors
10. Turn off the soldering iron we are all done soldering (except for the wireless part which comes way later)
Check out sparkfun's tutorial for pictures on correct placement here
Ardubot Parts
The Bot
Arduino - the brains of the robot $29.95
Ardubot PCB Board - the base of the robot $14.99
Wheels - 2 wheels $6.95
Caster - 1 caster $2.95
Motors - need 2 motors $15.95 each
Motor Brackets - set of 2 $4.95
H-bridge motor driver - needed to run the motors $2.35
Power switch - turns battery power on/off $1.50
Headers - their tutorial says 2 but I only used 1 $2.50
Battery Holder - regulated battery holder, 5V $10.95
Wireless Stuff
xbee - this is the wireless module, you will need 2 $22.95each
xbee explorer - this connects your xbee to your computer $24.95
xbee explorer regulated - the connects your xbee to your bot $9.95
Other stuff
computer with usb
usb a-b cable
usb a-mini b cable
soldering iron/ solder
wire
wirecutters/ wirestrippers
screwdriver
Look, I have an Ardubot
So sparkfun was suppose to have a robot class and competition this past weekend, they ended up getting canceled and morphed into more of a workshop. Lucky for me I got to go. In about 4 hours I had a arduino bot up and running by remote control on my netbook. So, I'm going to go through and do another tutorial and once again it might take me a while to get through it...
Ardubot Parts
Ardubot Solder
Ardubot Arduino
Ardubot Battery
Ardubot Wireless
Ardubot Parts
Ardubot Solder
Ardubot Arduino
Ardubot Battery
Ardubot Wireless
Sunday, October 25, 2009

Thursday, July 16, 2009
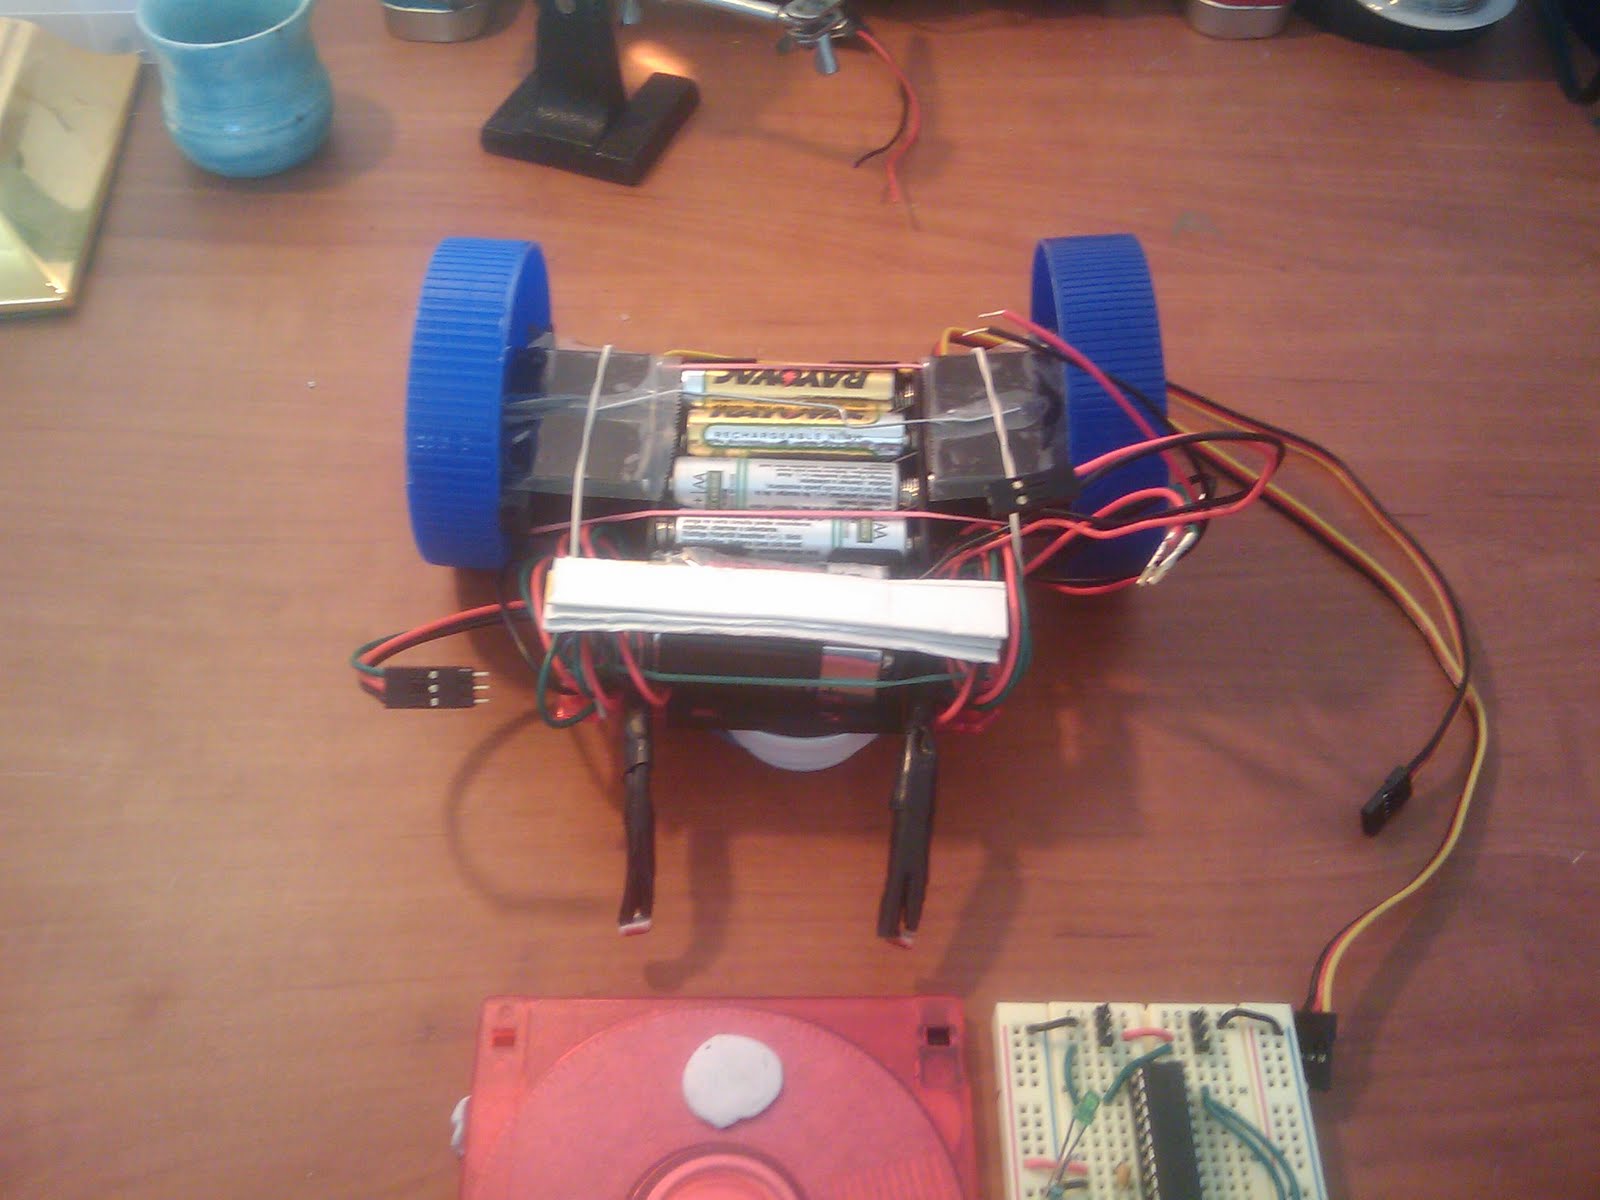
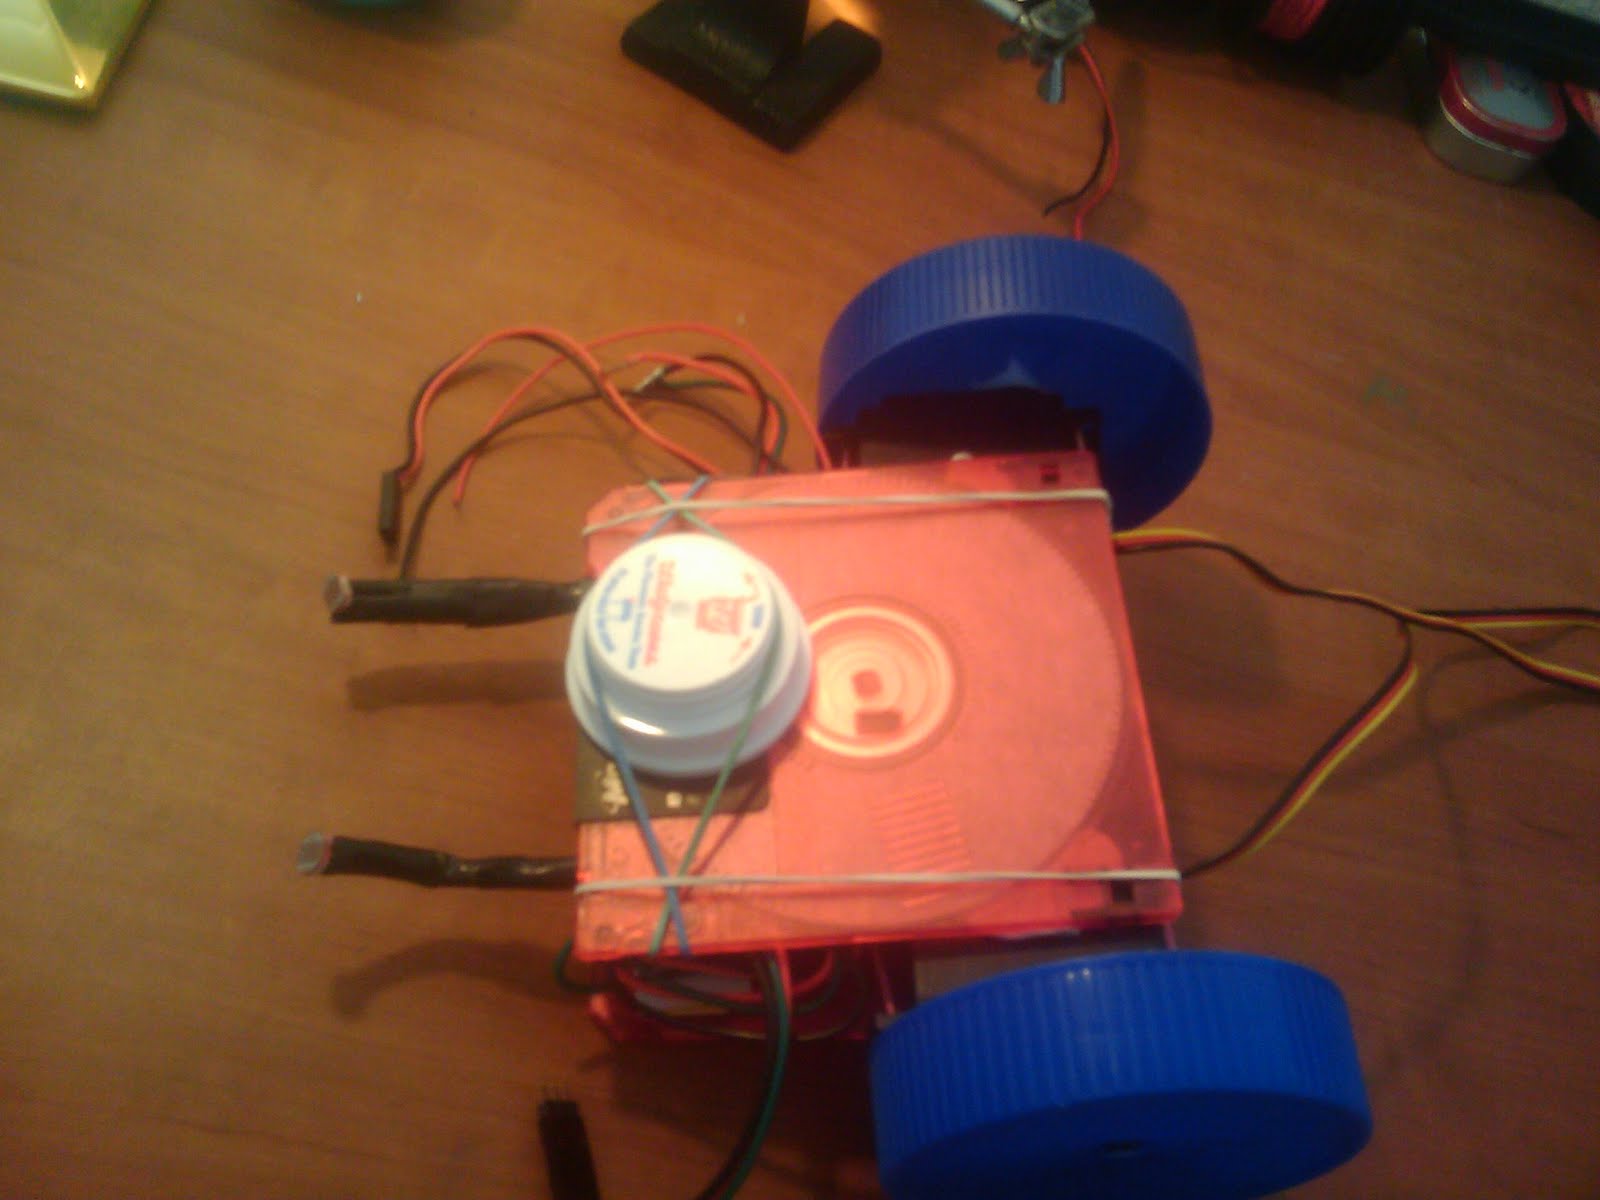
$150 robot - Build the chassis
Part 8 - Build the chassis
I built my chassis out of 2 floppy disks, and 2 peanut butter lids for wheels. The floppy's are a bit small but I was able to fit the batteries and servos between them and the bread board on top. The PB lids worked pretty well for wheels, I just poked a tiny hole in the center and then screwed them on to the servos. When I did my first draft everything was held together with poster putty and rubberbands. This worked well for everything but the servos, they need to be secure and not come off, so I ended up using a hot glue gun and attaching them securly to the bottom floppy. The top floppy still uses poster putty which allows me easy access to the batteries.
You will also need to add a caster to the front, basically it just slides around, I rubber banded a rx vial lid to the bottom and it works well on floors (not so well on carpet). Basically making a chassis is up to you, you can salvage parts from the house, the garbage, the kitchen or you can buy them (check out this site for chassis and chassis kits) which might be a bit expensive
There are a couple of downsides to this design
1. Exposure: the circuit and everything else is completely exposed, not good for running into or off things. The robot book I got put all the parts in a sandwich container, much less exposed
2. Wheels: Peanut Butter lids are cheap but you have to make sure your hole is centered (although mine had little dimples in the center) and they're not that sturdy. Check out lego wheels or such is you want better wheels and/or better traction.
Subscribe to:
Posts (Atom)